Add Token
Overview
Buttons on DApps allow users to directly add the specified tokens to the asset list on their TronLink user extension.
Specification
Example
Parameters
method: wallet_watchAsset fixed string
params: WatchAssetParams, the specific parameters are as follows:
type: Only 'trc10', 'trc20', 'trc721' are supported now
options:
address: the contract address of the token or the token id, required
symbol: placeholder (currently unused), optional
decimals: placeholder (currently unused), optional
image: placeholder (currently unused), optional
Returns
This method has no return value
Interaction
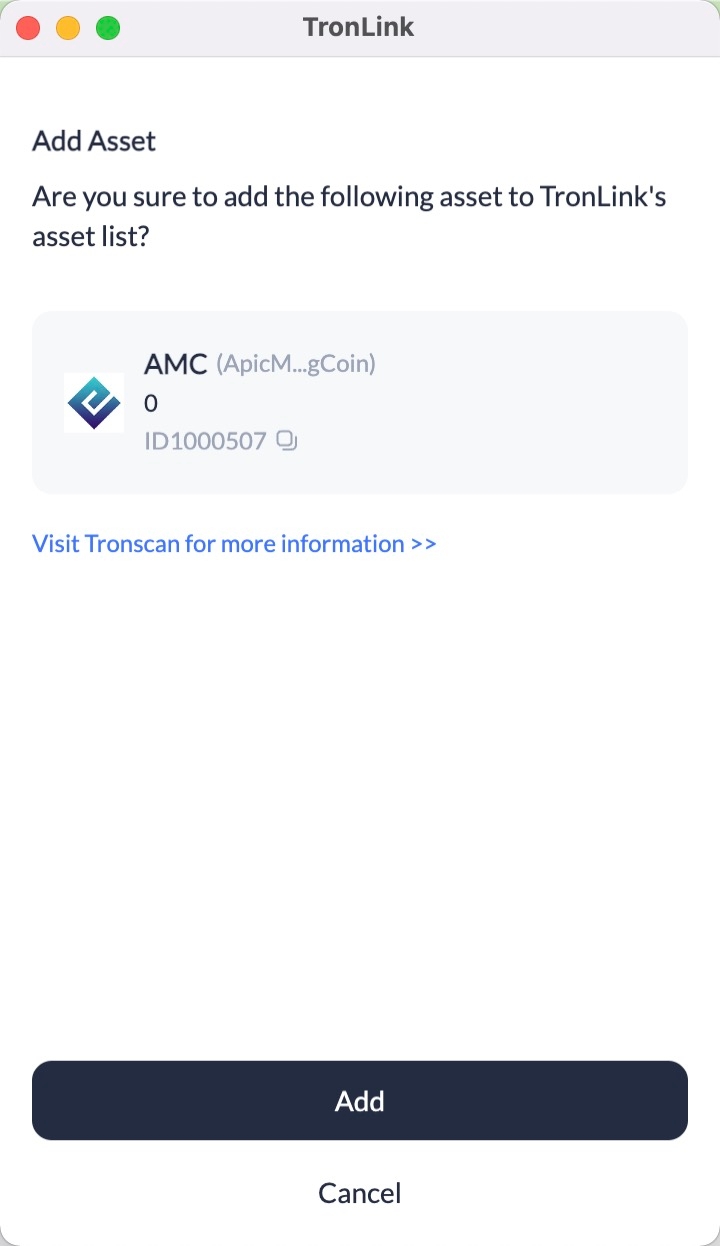
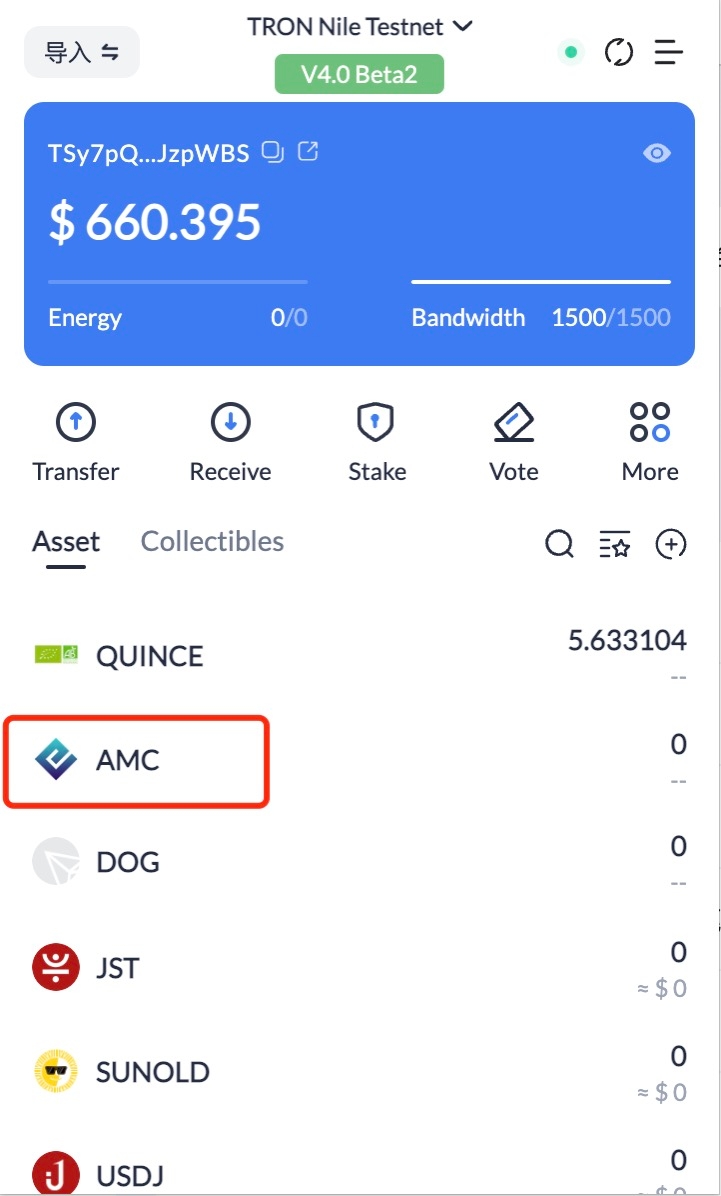
Add TRC10 assets
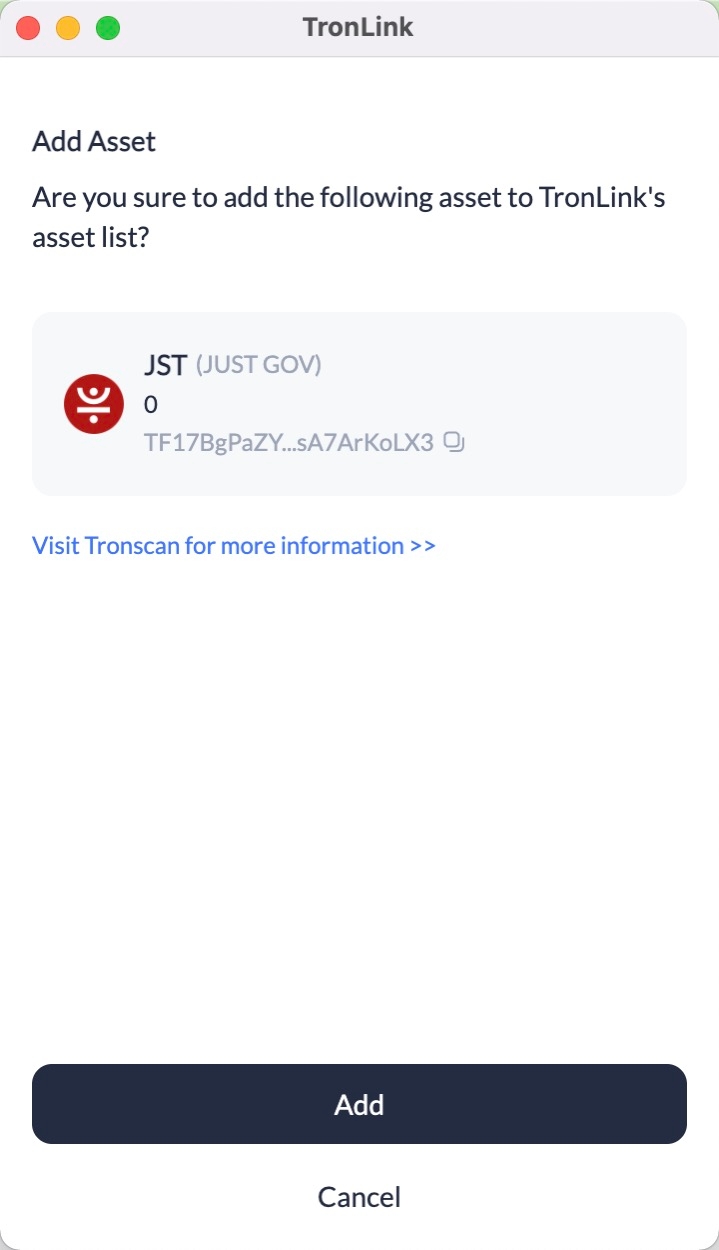
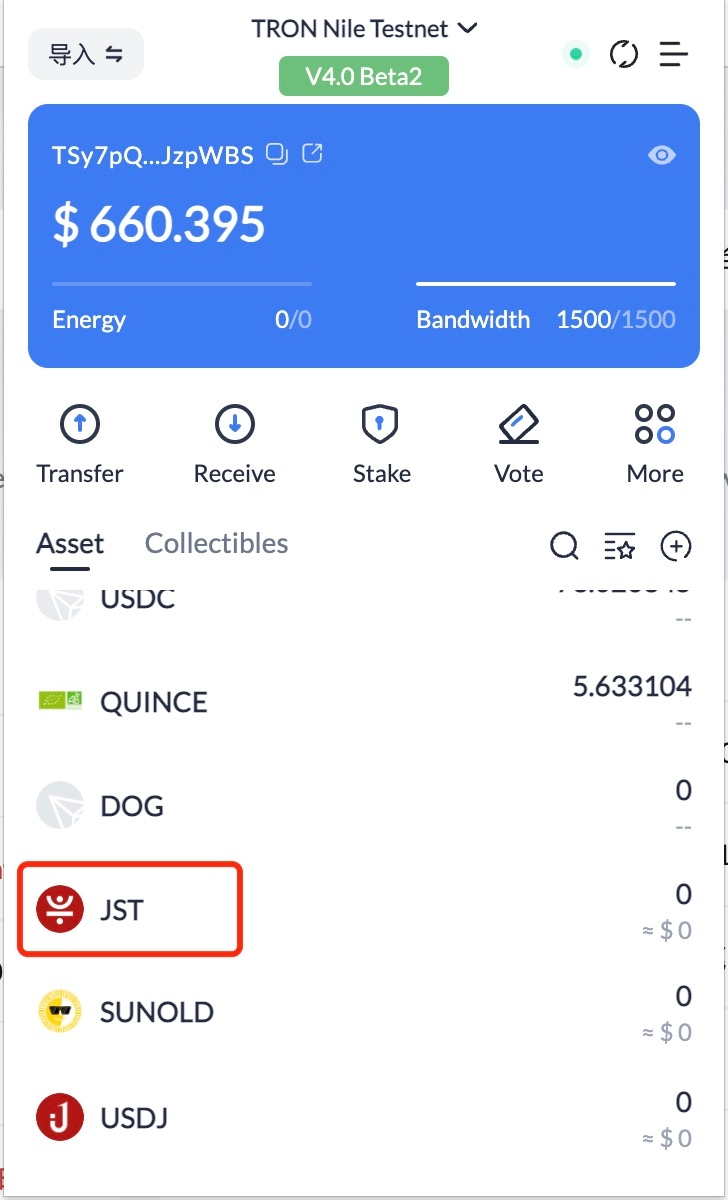
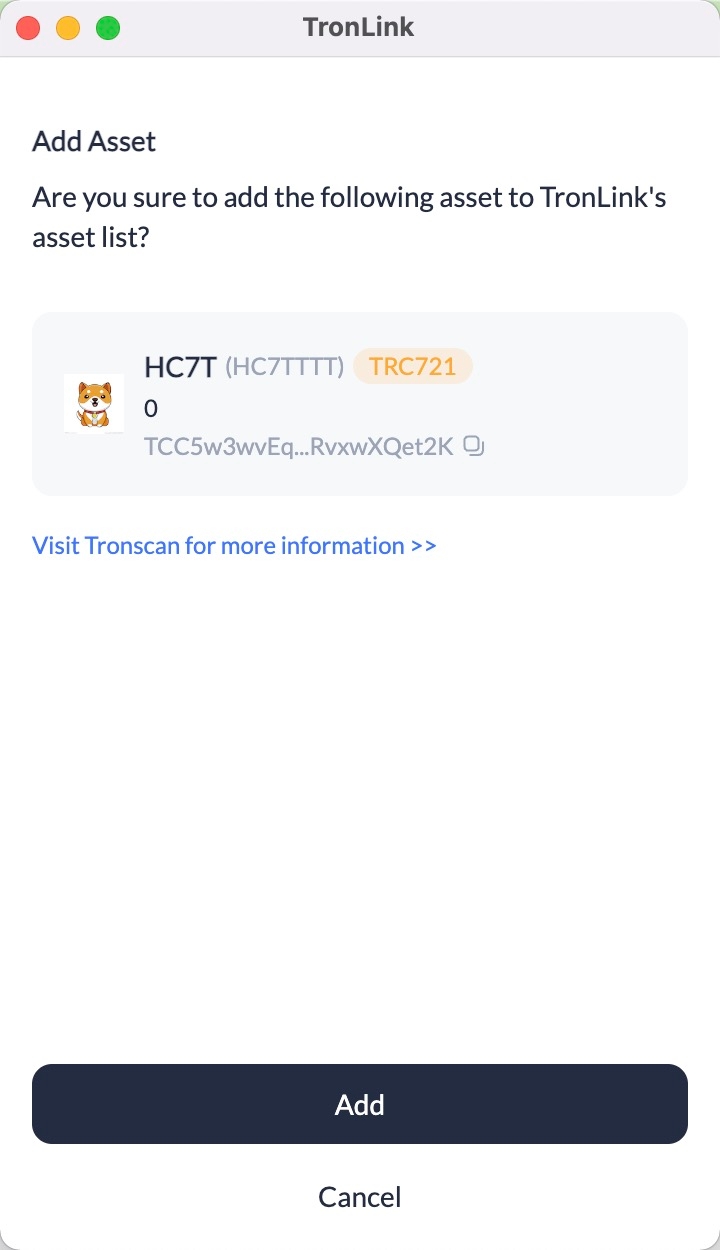
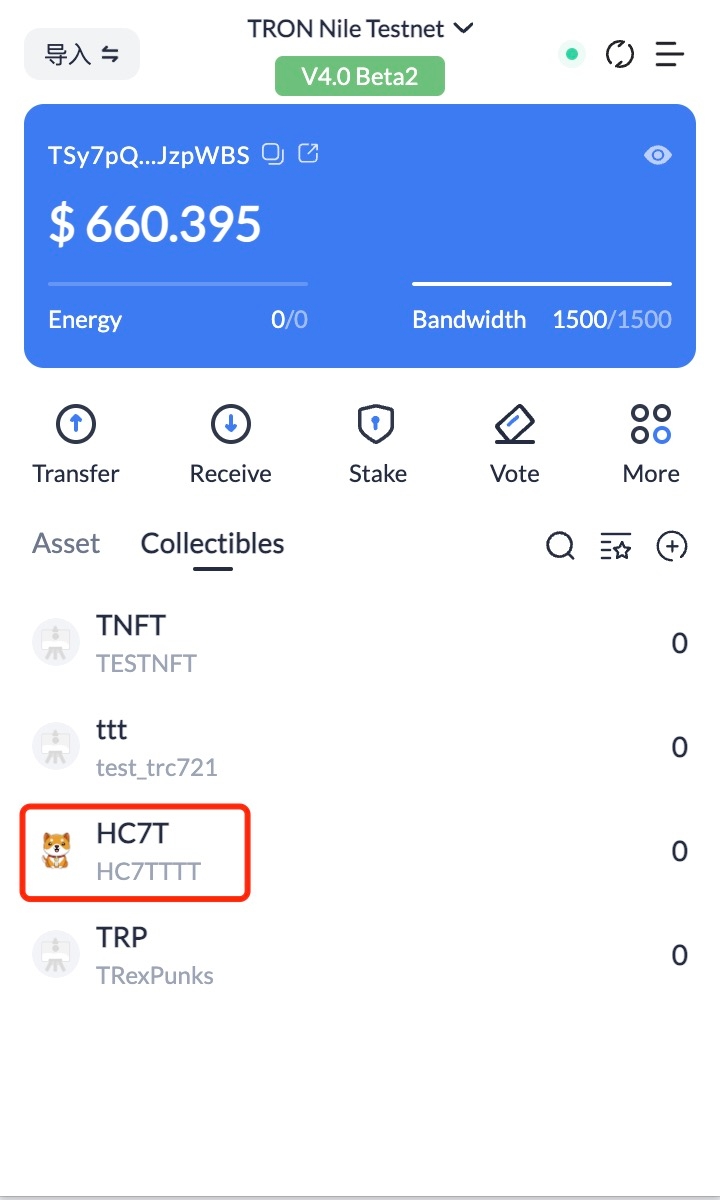
After clicking "Add", users can see the added assets as shown in the following screen:
Add TRC20 assets
Add TRC721 asset
Last updated